Pages

Monday, February 27, 2012

Quick and healthy lasagna

Life has been totally crazy. I am sorry I haven't posted lately. As you know we are building a house and trying to get everything together for the big move.

Here is our house so far! Yea it has begun!

So in this crazyiness of packing and preparing to rent our condo. I have found quick meals to be very helpful. I found this reciepe a few months ago. I found it on the back of the Ronzoni Healthy Harvest lasagna noodle box. The best part is it has a lot of healthy ingredients. I even will add turkey meat instead of beef and the heart healthy spagetti sauce. So I just had to share.

Healthy Harvest Easy Lasagna
1 lb. ground beef (or I used ground turkey)
3 cups (26 oz. jar ) spaghetti sauce
1 1/2 cups water
1 3/4 (15oz container) ricotta or small curd cottage cheese
2 cups (8oz) shredded mozzarella or Monterey Jack cheese, divided
1/2 cup grated Parmesan cheese
2 eggs
1/2 cup chopped fresh parsley
1/2 tsp salt ( I use a salt subsitute)
1/4 tsp ground black pepper
9 peices Ronzoni Healthy Harvest lasagna, uncooked

Heat oven to 350 degrees F. In 3-quart saucepan over medium-high heat, brown meat; drain. Add spaghetti sauce and water; simmer about 10 minutes. Meanwhile, in medium bowl, stir together ricotta cheese, one-half mozzarella cheese, Parmesan cheese, eggs, parsley, salt and pepper. Pour about 1 cup sauce on bottom of 13 x 9-inch baking dish. Arrange 3 ( I used 4 1/2) pasta peices lengthwise over sauce; cover with 1 cup sauce. Spread one-half chees filling over sauce. Repeat layers of lasagna, sauce and cheese filling. Top with layer of lasagna and remaining sauce; sprinkle with mozzarella cheese. Cover with foil. Bake 45 minutes. Remove foil; bake additional 10 minutes or until hot and bubbly. Let stand 10 minutes before cutting.
Makes 12 servings.


Saturday, February 11, 2012

Valentine Garland


Ahhh Valentine's day!! This is a little something we did to decorate

First you take construction paper and cut them into about 2 inch strips.

Then you form them into a heart shape and staple.

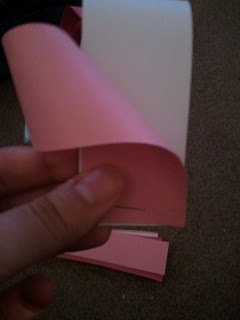
Here is what I did to be able to staple them.
( I put the heart in place, pinched and pushed it to the side to staple)
Finally you hook the next heart on like this.....on each side and staple again

Here is what ours look like........so cute! I just love this! My girls had so much fun making these :)


Inspired paintings

So my aunt saw this painting on http://www.ballarddesigns.com/heart-s-reason-giclee-print/paintings-prints/reproduction-prints/13866 and asked if I could make her one.
Their paintings are amazing! (but an expensive I mean amazing price lol) Well lets just say a little more than we have a budget for. And for a little hard work and a fraction of the price........here is what I created.
(Its not really great pictures, but in person it looks like wood.)


Saturday, February 4, 2012

Homemade Microwave popcorn

Who doesn't love popcorn, come on SOO good
So as always I was looking online and found this totally cool, easy, cheap way to make your own microwave popcorn. Total score. And I actually had everything I needed at home.


So two of my girls and I made some

Here is what you need:


  • 1/4 cup popcorn kernels
  • 1 tbsp oil ( I used half that)
  • salt
  • paper bag
  • staple or tape


First you pour in 1/4 cup popcorn in your paper bag

Next you add your oil and salt or whatever you want

Last you staple ( I was leery about this but it worked just fine, I have also seen people use tape) the bag closed and let out all the air and microwave for like 2 1/2- 3 minutes


So good!


Friday, February 3, 2012

Learning my ABC's

I recently visited a really neat blog post about learning fine motor skills from 'Rub some Dirt on it'. She posted a really neat idea about developing fine motor skills through this game. I also loved it because it teaches them to letters and to start the spelling process! My daughter Emily loves it, she often tells me she is getting ready for school when she plays! Too cute


and here is my version :)


First I took printed out some simple words out with pictures and put them on cardboard and "laminated" them with tape, cheesy I know but it works really well.


Then I took the left over decorated clothes pins I had from my Sister-in-laws bridal shower and spelled out each of the words.


Last I found a container to keep them in and TA DA


Angry Bird Cake

My husband had a birthday yesterday and I wanted to do something unique. I found these angry birds napkins and table cloth at Walmart. Then I knew exactly what I was going to make.
I'm sorry I should have taken pictures of the process but I laid it out for you. It was so simple and I think it turned out really great! 
( click picture for enlarged picture)

Angry Bird Cake
  • 2 cake mixes
  • large marshmallows
  • 1 can frosting
  • yellow cardboard
  • black frosting or food coloring

 First: make two rounds, leaving one round with the round top, stack.
Next: make a small round, I just cut the top off and used the rounded part, place on stacked rounds.
Then: frost in a green color (for pig), add ears, and smoosh marshmallows for eyes.
Last: detail with crown, eyebrows, etc.